How to Fix Roof Leak Under Solar Panels: Expert Tips to Repair and Proper Installation
If you’ve discovered a leak beneath your solar panels, you’ll want to address it carefully to avoid costly damage. Fixing it involves more than just patching up the roof—you need to take into account how the panels are mounted and sealed. With the right approach, you can stop the leak and protect your investment. But before you start, there are vital steps and details you should know to get the job done right.
Establishing expertise: Understanding roof leak under solar panels and repair basics
Common causes of roof leak under solar panels and identifying damage
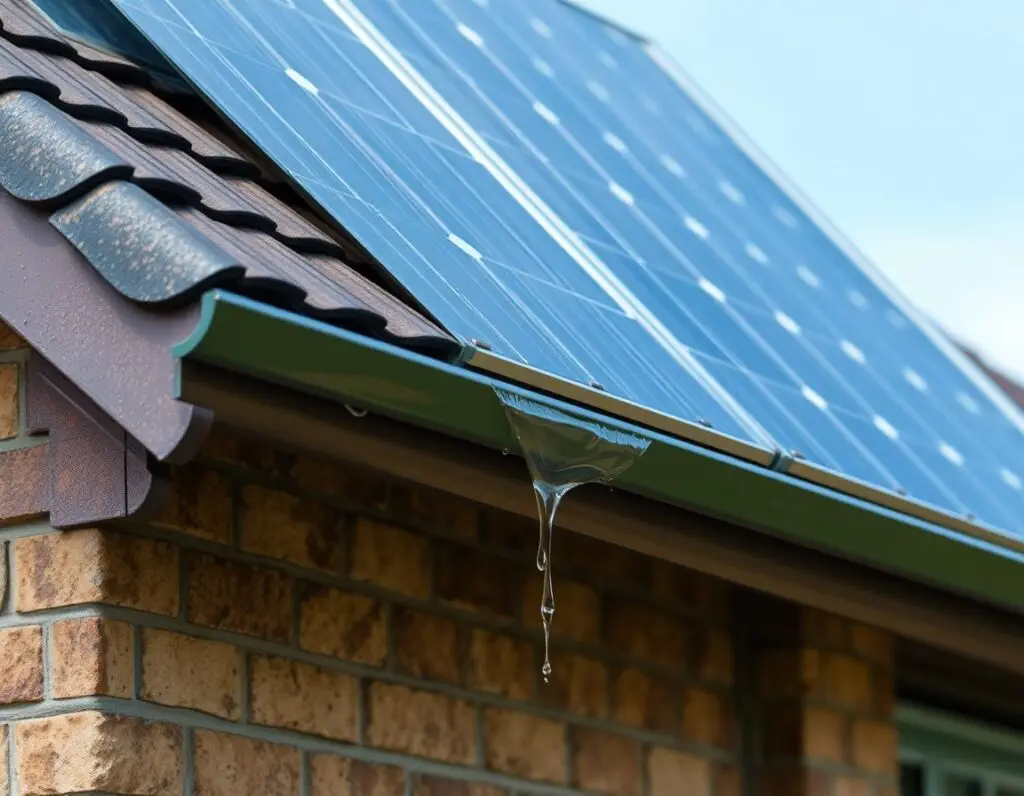
Although solar panels provide clean energy, they can sometimes hide roof leaks that go unnoticed until damage worsens. A common cause of roof leak under solar panels is improper mounting, which can puncture or stress the roof surface. Weather exposure can also degrade seals around mounts, allowing water intrusion. (PPM, Lyons Roofing)
Additionally, debris accumulation beneath panels traps moisture, accelerating damage. You’ll want to be aware of discoloration, mold, or soft spots on your roof surface—clear signs that a roof leak may be present.
Since panels cover much of the roof, conducting a thorough inspection is essential for spotting hidden issues early. Understanding these causes helps you innovate with proactive maintenance and avoid costly repairs later.
How to inspect and test for roof leak under solar panels effectively
Before you start repairing a roof leak under solar panels, you need to inspect and test the area carefully to pinpoint the problem. Begin by examining the solar panels and mounting hardware for signs of damage or looseness that may disrupt the roof’s waterproofing.
Next, simulate water flow using a garden hose, directing water along seams and penetrations to observe where leaks appear inside. Pay close attention to flashing and sealant conditions during your inspection—these are common weak points. Use a moisture meter or infrared camera to diagnose hidden dampness beneath panels without removal. Document your findings precisely to target repairs effectively.
This thorough inspection approach not only helps you locate the roof leak but also informs innovative solutions that protect both your roof and solar investment.
Importance of proper installation to prevent roof leaks and ensure durability
When installing solar panels, guaranteeing proper sealing and secure mounting is essential to prevent roof leaks and maintain durability. You need to apply high-quality sealant around all penetrations and use appropriate flashing to protect your roof from water intrusion. Improper installation can lead to roof damage, costly repairs, and reduced panel efficiency. Here’s a quick guide to what proper installation addresses:
| Installation Aspect | Risk if Neglected | Preventive Measure |
|---|---|---|
| Mounting Points | Water seepage | Use waterproof flashing |
| Sealant Quality | Roof leaks | Apply industrial-grade sealant |
| Panel Alignment | Structural strain | Ensure precise alignment |
| Roof Material | Compatibility issues | Match mounting hardware |
| Inspection | Undetected damage | Regular maintenance checks |
Following these steps innovatively ensures your solar panels perform long-term without causing roof leaks or damage.
Step-by-step guide to fix roof leak under solar panels safely and efficiently
Temporary fixes and sealant application to seal leaks before repair
Although a permanent roof repair requires professional attention, you can quickly apply a temporary sealant to stop leaks under your solar panels and prevent further damage. Here’s how to act fast and smart:
- Identify the exact spot of the roof leak beneath your solar panels using a flashlight or moisture detector.
- Clean the area thoroughly, removing dirt and debris for ideal sealant adhesion.
- Choose a high-quality, waterproof sealant designed for roofing and solar panel installation.
- Apply the sealant generously over the leak and surrounding seams, smoothing it out to create a watertight barrier.
This temporary fix buys you time before a full repair, protecting your roof and panels without disrupting your innovative solar setup.
Detailed steps to fix a roof leak under solar panels including panel removal
To fix a roof leak under your solar panels, you’ll need to carefully remove the panels to access the damaged area without causing harm to your system. Begin by shutting off the electrical supply and using proper tools to detach the solar panels, noting their wiring and mounting positions for a smooth reinstallation process.
Once removed, inspect the roof for water stains that indicate the leak source. Clean the area thoroughly before addressing the damage. After repairing the leak, apply a quality sealant around vulnerable spots to prevent future issues.
Finally, reinstall the solar panels, ensuring all connections are secure and aligned with the original installation process. This innovative approach combines safety and efficiency, protecting your roof and maximizing your solar investment.
Best roof repairs and seal techniques around flashing and tile areas
With the solar panels safely removed and the leak identified, focus on repairing the flashing and tile areas where water often penetrates. Addressing these spots innovatively guarantees a lasting roof repair. Here’s how to tackle the issue:
- Remove damaged or loose tiles carefully to access the flashing beneath.
- Inspect flashing for cracks or rust; replace or reshape it to create a tight barrier.
- Apply a high-quality, weather-resistant sealant around the edges of flashing and under tiles to block water infiltration.
- Reinstall tiles securely, ensuring they align perfectly to avoid gaps.
Considering different roof types when repairing and fixing roof leak under solar

How to fix roof leak under solar on tile roofs: special considerations
Although fixing a roof leak under solar panels can be tricky, tile roofs demand extra care due to their fragile nature and unique installation.
When addressing a roof leak beneath solar panels on tile roofs, follow these special considerations to guarantee effective roof repair and installation:
- Carefully remove solar panels without damaging tiling or mounting hardware.
- Inspect and replace broken or cracked tiles to restore the roof’s waterproof integrity.
- Use flexible, high-quality sealants designed for tile roofs to seal penetrations and prevent future leaks.
- Reinstall solar panels with mounting systems that minimize tile disturbance and allow for proper water drainage.
Repair approaches for leaks on solar panel installations with different roof materials
Addressing roof leaks under solar panels means adapting your repair methods to the specific roofing material involved. Each roof material demands tailored repair approaches to effectively stop water intrusion and maintain the integrity of your solar panel installation. (Decra, PPM Solar)
| Roof Material | Common Leak Cause | Repair Approach | Tools Needed | Innovation Tip |
|---|---|---|---|---|
| Asphalt Shingles | Damaged flashing | Replace flashing & sealant | Sealant, flashing kit | Use flexible waterproof membranes |
| Metal Roof | Loose fasteners | Tighten/replace fasteners | Torque wrench | Employ rubber gaskets for seals |
| Tile Roof | Broken tiles around mounts | Replace tiles & waterproofing | Replacement tiles | Use adjustable mounts |
| Flat Roof | Ponding water near mounts | Improve drainage & seal seams | Sealant, drainage tools | Integrate liquid-applied membranes |
| Wood Shingles | Rot or cracks near mounts | Remove damaged wood + sealant | Wood sealant, replacement | Apply breathable water barriers |
Maintaining roof integrity while performing solar panel-related roof repairs
Since solar panel repairs often require working directly on your roof, you must preserve its integrity to prevent further damage. Whether you have asphalt shingles, metal, tile, or flat roofs, each demands tailored techniques to maintain roof integrity during solar panel repair.
Focus on:
- Evaluating your roof type for compatible waterproofing materials.
- Using non-invasive tools to avoid punctures or cracks.
- Scheduling regular roof maintenance to spot issues early.
- Hiring a professional installation team experienced in diverse roofing systems.
Expert recommendations and maintenance tips
When to call a professional for fix roof leak under solar issues
Although minor roof leaks under solar panels can sometimes be managed with DIY fixes, it’s crucial to call a professional when the damage involves complex wiring, structural concerns, or persistent moisture.
A professional roofer or qualified installer ensures your solar installation stays safe and efficient. You should contact an expert for:
- Extensive roof leak damage beyond surface cracks.
- Signs of water infiltration affecting electrical components.
- Structural issues weakening the roof’s integrity.
- When previous roof repairs haven’t resolved the leak.
Innovative solutions require expert assessment to prevent costly future damage. Trusting a professional roofer guarantees precise diagnosis and seamless roof repairs, preserving both your home and solar investment. Don’t risk improper fixes; call a qualified installer to maintain peak performance and safety.
How to maintain your roof and solar panels to prevent future leaks
Proper maintenance of your roof and solar panels plays a crucial role in preventing leaks and extending their lifespan. Prioritize regular roof inspection and waterproofing to shield against water damage. Guarantee proper installation of solar panels to avoid weak points that cause leaks. Address minor issues with prompt solar panel repair to maintain system integrity. Embrace innovative tools for efficient roof maintenance, combining technology with safety. (Cenvar Roofing)
| Task | Key Action |
|---|---|
| Roof Inspection | Check for cracks and wear |
| Waterproofing | Apply sealants on vulnerable spots |
| Solar Panel Repair | Fix loose mounts or wiring |
| Proper Installation | Use certified installers |
| Routine Cleaning | Remove debris from panels |
Keeping these focused steps ensures your roof and solar setup stay leak-free and efficient.
Current research and future trends in roof leak repair under solar panels

Emerging sealant technologies for long-lasting solar panel roof repairs
As solar panel installations become more common, researchers are developing advanced sealant technologies designed to prevent leaks and withstand harsh weather conditions. These innovations guarantee your roof leak repair holds strong, maintaining a watertight seal essential for long-term roofing maintenance.
You can expect:
- Nano-enhanced sealants that bond deeper with roofing materials for superior durability.
- Flexible polymers that adapt to thermal expansion and contraction without cracking.
- UV-resistant compounds that protect the seal from sun damage over time.
- Eco-friendly, low-VOC formulas that combine performance with environmental safety.
Innovations in installation methods to mitigate roof leak under solar panels
When installing solar panels, choosing advanced mounting systems can considerably reduce the risk of roof leaks. As a solar installer, you’ll want to use low-profile mounting brackets designed to minimize roof penetrations, which are common leak points.
Innovations now include integrated waterproofing membranes that seal around penetrations, eliminating gaps where water can enter. Combining these with high-quality, UV-resistant sealant ensures long-lasting protection. Some systems even use clamp-based mounts that attach without drilling, further reducing leak risks.
Future trends focus on smart materials that adapt to roof movements, maintaining waterproof integrity over time.
Case studies highlighting successful repair and maintenance of roof leak under solar panels
Although repairing roof leaks under solar panels can be challenging, several case studies show effective strategies that keep your roof and system secure. These examples highlight how innovative repair and maintenance approaches improve installation outcomes and prevent future leaks.
You can apply these proven tactics to your project:
- Using advanced sealants around mounting points to stop water intrusion without compromising panel stability.
- Implementing flexible flashing designs that adapt to roof movement, reducing stress on installation sites.
- Scheduling regular maintenance inspections to detect early signs of roof leak and address them promptly.
- Integrating smart sensors that monitor moisture levels beneath solar panels for real-time leak detection.
Conclusion
Fixing a roof leak under your solar panels doesn’t have to be overwhelming. By carefully inspecting mounting points, replacing damaged flashing, and sealing all penetrations properly, you’ll protect your roof and your investment. Remember to remove panels cautiously and maintain regular check-ups to catch issues early. With the right tools and techniques, you can guarantee a watertight seal and extend the life of both your roof and solar system. Stay proactive and keep your home safe!
FAQs
1. Can Solar Panels Increase My Home Insurance Premiums?
Yes, solar panels might raise your home insurance premiums since they add value and potential risks. But you can often get discounts for eco-friendly upgrades, so check with your insurer to find the best coverage and savings.
2. What Tools Are Essential for DIY Solar Panel Roof Repairs?
You’ll need a cordless drill, waterproof sealant, roofing nails, a utility knife, and a ladder. Don’t forget safety gear like gloves and goggles. These tools empower you to tackle repairs confidently and innovatively.
3. How Do Warranty Claims Work for Solar Panel Roof Leaks?
You’ll want to review your solar panel and roofing warranties closely. Typically, manufacturers cover panel defects, while roofing warranties handle leaks. Document the issue promptly, contact providers, and coordinate claims to guarantee innovative, hassle-free repairs.
4. Are There Eco-Friendly Materials for Roof Leak Repairs Under Solar Panels?
You can choose eco-friendly materials like recycled rubber membranes, low-VOC sealants, and sustainable metal flashing. These options protect your roof while minimizing environmental impact, aligning with innovative, green home improvement practices you’ll appreciate.
5. Can Roof Leaks Under Solar Panels Affect Energy Efficiency?
Yes, roof leaks under your solar panels can reduce energy efficiency by causing moisture damage and shading issues. You’ll want to fix leaks promptly to maintain ideal panel performance and protect your innovative energy setup.

